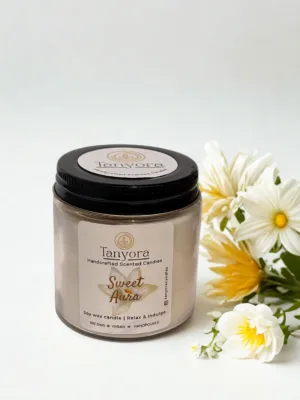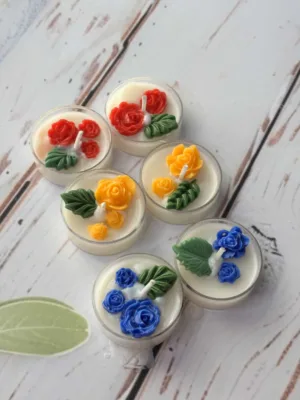
There is a unique, quiet magic to lighting a candle. Whether you are setting the mood for a relaxing evening bath, winding down with a favorite book, or simply adding a touch of ambient warmth to your workspace, a flickering flame instantly transforms a room. However, have you ever noticed your favorite candle burning straight down the middle, leaving a thick wall of wasted wax around the edges? Or perhaps you’ve seen dark, unsightly black smoke curling up from the wick, leaving soot marks on your wall or glass vessel.
These common frustration points—known as tunneling and sooting—are entirely preventable.
Candlemaking is both an art and a science, and just like any fine artisanal product, candles require a small amount of intentional care to perform at their best. By adopting a few simple candle care habits, you can extend your candle’s lifespan by up to 30%, ensure a clean and toxic-free burn, and maximize the reach of its fragrance.
Here is your complete guide to burning candles like a professional.
1. The Critical First Burn: Setting the Candle’s “Memory”
The single most important burn in a candle’s entire lifespan is the very first time you light it.
Wax has what candlemakers refer to as memory. When wax melts and then cools, it establishes a pattern for every subsequent time it is lit. If you light a brand-new candle, let it burn for 15 minutes, and then blow it out, only a tiny circle of wax around the wick will have melted. The next time you light that candle, the wax pool will stop at that exact same perimeter and begin digging downwards, creating a deep pit or “tunnel” straight to the bottom of the container.
How to Prevent Tunneling:
- The Golden Rule: On the first burn, let the candle stay lit until the melt pool reaches the absolute edge of the container or vessel.
- Time Required: As a general rule of thumb, budget roughly one hour of burn time per inch of the candle’s diameter. For a standard 3-inch jar candle, your first burn should last around 3 hours.
- The Result: Creating a full, edge-to-edge melt pool sets the wax memory correctly, ensuring that the wax consumes evenly down the vessel throughout its lifetime without leaving wasted wax on the sides.
2. Always Trim the Wick (The 1/4-Inch Rule)
If you only implement one candle care habit from this guide, make it this one: trim your wick before every single burn.
When a wick burns, the tip of the cotton collects unburned carbon, forming a tiny bulb or “mushroom” shape. If you light a candle with a long, untrimmed wick or an old carbon build-up, several bad things happen simultaneously:
- The flame will burn excessively large and unstable.
- The wick will produce dark black soot (carbon residue) that stains your jar, walls, and ceiling.
- The wax will burn off much faster than necessary, drastically shortening the candle’s overall lifespan.
- The extra heat can overheat the container, posing a safety hazard.
How to Properly Trim:
- Ideal Length: Trim the wick to 1/4 inch (6 mm) before lighting.
- Tool of Choice: While standard scissors work when a candle is brand new, a dedicated Wick Trimmer makes it effortless to clip wicks inside deep jars without tipping the vessel.
- Timing: Always trim the wick when the wax is cold and fully solid. Never attempt to clip a wick while the wax pool is still liquid.
3. Burn Duration: The 4-Hour Limit
When you find a fragrance you love, it’s tempting to leave the candle burning all day long. However, burning a candle for too long can be just as damaging as blowing it out too soon.
The maximum recommended burn time for any container candle is 4 hours at a time (or 2 hours for small tea lights).
Why Overburning Kills Your Candle:
- Melt Pool Overheating: Leaving a candle lit for longer than 4 hours causes the entire liquid wax pool to become too deep and hot.
- Wick Drowning: As the wax liquefies too deeply, the wick loses structural support and can lean, drift off-center, or sink beneath the liquid wax.
- Fragrance Degradation: Excessively high temperatures can “scorch” the delicate fragrance oils, changing the smell of the candle or causing the scent to evaporate prematurely.
If you want continuous scent throughout the day, blow out the candle at the 4-hour mark, let the wax cool and solidify completely (about 2 hours), trim the wick, and relight it.
4. How to Properly Extinguish a Candle
How you put out your candle is just as important as how you light it. Simply blowing out a candle produces a plume of acrid smoke, sends hot wax droplets flying, and leaves a lingering burnt smell that ruins the fresh scent room environment you just created.
Modern Extinguishing Methods:
- Use a Wick Dipper: This is the cleanest method. Using a metal tool called a wick dipper, gently push the lit wick down into the liquid wax pool to drown the flame instantly, then lift the wick back up and straighten it. This prevents all smoke and coats the wick in liquid wax, making it easier to relight next time.
- Use a Candle Snuffer: A classic bell-shaped metal snuffer smothers the flame by cutting off oxygen, eliminating flying ash and wax splatters.
- Vessel Lids: If your candle comes with a metal or wooden lid, placing the lid over the jar will extinguish the flame smoothly.
5. Ideal Environment and Placement
Where you set your candle plays a major role in how cleanly it burns. Even a properly trimmed candle will produce smoke and burn unevenly if it is placed in an unstable environment.
- Avoid Drafts: Keep burning candles away from open windows, ceiling fans, air conditioning vents, and high-traffic hallways. Air currents push the flame side-to-side, causing uneven melting and black soot marks.
- Flat, Heat-Resistant Surfaces: Always set candles on sturdy, flat surfaces away from curtains, books, paper, or flammable decor.
- Group Wisely: If burning multiple candles together, space them at least 3 to 4 inches apart so the heat from one flame does not melt the side of an adjacent candle.
6. Safe Storage and Disposal
Proper maintenance doesn’t stop when the flame is out. Storing your collection correctly ensures that the wax and fragrances remain fresh for months or years.
- Dust Protection: Wax naturally attracts airborne dust and hair. Keep jars covered with their lids or glass cloches when not in use. If dust builds up on the wax surface, wipe it away gently with a damp cotton pad before lighting.
- Keep Away from Sunlight: UV rays from direct sunlight will cause white or light-colored wax to turn yellow and can break down essential oils over time. Store candles in a cool, dry, dark place.
- Knowing When to Stop: For safety reasons, discontinue burning a container candle when there is approximately 1/2 inch (1.2 cm) of solid wax remaining at the bottom. Burning a candle past this point can overheat the base of the glass, causing the vessel to crack or heat-damage your table surface.
Summary Checklist for Everyday Candle Care
To keep your home smelling incredible and your candle collection in pristine shape, follow this quick daily ritual:
- Check the Wick: Trim to 1/4 inch before every burn.
- Commit to the Melt: Let the wax pool reach all edges of the vessel.
- Cap the Time: Never burn for more than 4 hours in a single session.
- Dip or Snuff: Drown the flame in wax or use a snuffer instead of blowing it out.
- Keep It Draft-Free: Burn in still, calm air away from fans and vents.
By spending just five seconds trimming a wick and placing your candle mindfully, you ensure a cleaner burn, purer scent throw, and maximum value from every single jar. Happy burning!